
Assembling a wooden mechanical model is different from finishing a flat puzzle. The parts do not only need to fit together. They often need to move, turn, lift, swing, slide, or hold alignment after the final step. That is what makes the finished model satisfying, but it is also why beginners can run into small problems that feel bigger than they really are.
Most beginner mistakes are not signs that the builder is bad at model kits. They usually come from rushing, skipping small checks, mixing parts, or treating a moving mechanism like a static decoration. With a calmer process, the same kit becomes easier to understand and more enjoyable to finish.
If you are new to ROKR-style builds, the Mechanical Models collection is a good place to see how different kits turn gears, handles, tracks, and display objects into hands-on projects. Before choosing or building one, it helps to know the common mistakes to avoid.
The best beginner habit is simple: pause before forcing anything. A small check early can save a stuck gear, a loose shaft, or a part installed in the wrong direction later.
Common Mistakes at a Glance
Many assembly problems start small. A tab faces the wrong way, a gear sits too tightly, or a builder waits until the end to test a moving section. This table gives a quick overview before we go deeper.
| Mistake | What it can cause | Better habit |
|---|---|---|
| Skipping the parts check | Missing, mixed, or hard-to-find pieces later | Review the boards, small parts, and instruction steps before starting. |
| Forcing wooden pieces | Broken tabs, stress marks, or tight mechanisms | Check direction, alignment, and fit before adding pressure. |
| Ignoring orientation | Reversed panels, gears, or decorative layers | Compare holes, notches, printed marks, and mirror-image parts carefully. |
| Not testing movement | A finished model that looks right but does not move smoothly | Test moving sections as soon as the instructions make it possible. |
| Mixing small parts | Lost shafts, rings, screws, elastics, or tiny decorative pieces | Use trays, labels, or small containers while building. |
Mistake 1: Skipping the Parts Check
Beginners often want to start assembling as soon as the box is open. That excitement is good, but mechanical wooden models reward a slower first look. Before pressing out parts, scan the boards, small hardware, and instruction booklet. Notice which pieces look similar, which parts are tiny, and which steps introduce movement.
This is especially useful for models with gears, shafts, cranks, tracks, or layered mechanisms. A quick parts check helps you understand the model as a system rather than a pile of pieces.
Mistake 2: Rushing the Instructions
Wooden mechanical models usually build in a sequence for a reason. One part may hold another part in place. A shaft may need to pass through several layers before a gear works. A decorative panel may look simple but still affect alignment. If you jump ahead, the model may still look correct for a while, then become difficult to fix later.
Read each step before touching the part. Then read it again while holding the pieces. This habit sounds slow, but it often makes the build faster because you spend less time undoing mistakes.
Mistake 3: Forcing Parts Into Place
One of the most common beginner mistakes is pushing harder when a piece does not fit. With wooden kits, resistance usually means something needs attention. The part may be upside down, reversed, slightly misaligned, or still attached to a tiny edge from the board.
Before forcing a piece, check the shape of the tab, slot, and surrounding parts. If the instructions call for sanding or wax in a specific place, follow that guidance. If they do not, avoid making major changes just because a piece feels tight for a moment.
Do not treat every tight fit as a problem to solve with force. A careful test fit tells you whether the issue is direction, alignment, leftover burrs, or a moving part that needs more freedom.
Mistake 4: Over-Sanding or Under-Sanding
Sanding can be helpful, but too much sanding can make a piece loose. Too little can make a moving part stiff. The tricky part for beginners is knowing that not every connection needs the same treatment. A structural tab may need a firm hold, while a rotating or sliding part may need smoother movement.
Use light, controlled sanding only where the instructions or the fit suggests it. Test the piece again after a small adjustment. It is easier to remove a little more material than to recover a part that has become too loose.
Mistake 5: Missing Front, Back, and Left-Right Orientation
Many wooden model parts look nearly symmetrical at first glance. A hole may sit slightly off-center. A notch may belong on one side. A printed surface may need to face outward. When a beginner installs one of these parts backward, the mistake may not show up until several steps later.
Before pressing a part into place, compare it with the drawing and nearby pieces. Look for holes, curves, small slots, and printed details. If two parts look like mirror images, pause and confirm which side belongs where.
Mistake 6: Ignoring Gears, Shafts, and Moving Clearance
Mechanical models depend on movement. Gears need space to turn. Shafts need to sit straight. Handles, tracks, and rotating parts need enough clearance. A model can look finished but still feel stiff if the moving parts were assembled too tightly.
This is why testing matters. Turn a handle gently when the instructions allow it. Check whether a gear spins freely. Watch for parts that rub or lean. The article on mechanical model kits, patience, testing, and iteration explains the same habit from a learning perspective: every small test gives useful feedback.
Mistake 7: Waiting Until the End to Test
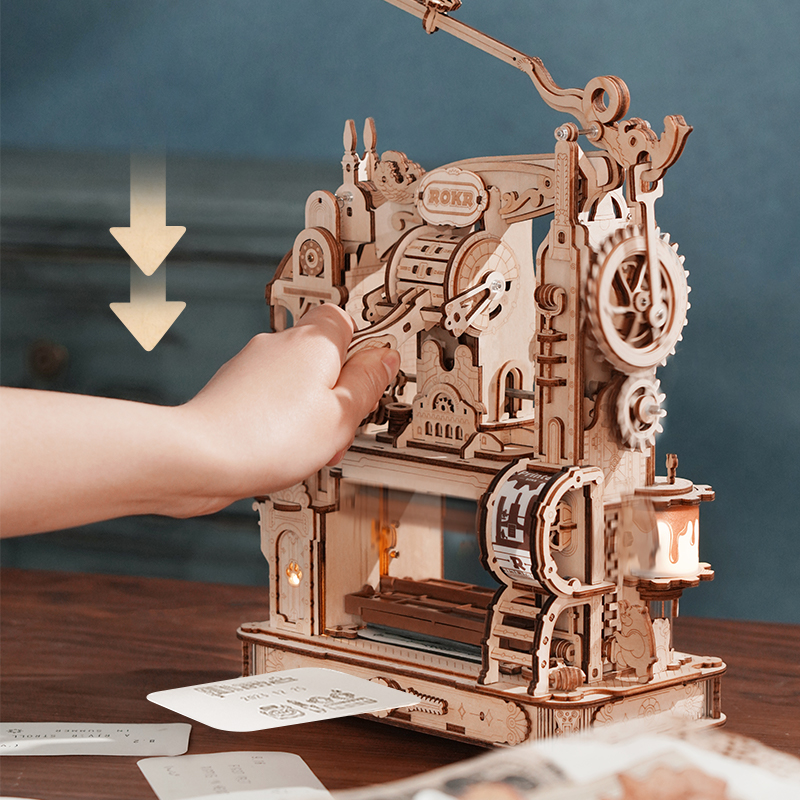
It is tempting to finish the whole model before testing anything. But with mechanical wooden models, testing only at the end can make troubleshooting harder. If a gear does not turn, you may need to look through many layers to find where the issue began.
Test as you build. A small motion check after each mechanical section can show whether the problem is tightness, orientation, friction, or alignment. For track-based models such as a marble run, this habit is especially useful because small changes can affect the path later.
Mistake 8: Losing or Mixing Small Parts
Small parts can decide whether a mechanical model works smoothly. Shafts, rings, spacers, connectors, screws, elastics, and decorative pieces may look minor, but they often have a specific job. Beginners sometimes empty everything onto the table, then spend more time searching than building.
Use a simple sorting system. A few small containers, folded paper trays, or labeled areas on the table can make the build calmer. Keep removed wooden pieces near their original board until you need them. If a part looks similar to another, do not separate it from its label too early.
Mistake 9: Treating Powered Parts as an Afterthought
Some wooden mechanical models include lights, motors, music, or other powered features. Others are fully manual. The mistake is not choosing one type or the other. The mistake is ignoring the extra steps when a kit does include power-related parts.
If your kit includes electrical or powered components, follow the instructions closely and avoid guessing. Check placement before covering the component with later layers. For beginners who want a simpler first experience, a manual model may feel more comfortable. For builders who enjoy motion, light, or sound, the added steps can make the finished model more rewarding.
Mistake 10: Forgetting the Finished Display
A wooden mechanical model is not only an assembly project. It is also something that may live on a desk, shelf, or display area after the build. Beginners sometimes focus only on finishing the steps and forget to think about how the model will be handled later.
Before building, choose a clean workspace and think about the finished model's future place. After building, move it carefully and keep it away from crowded areas where delicate parts may be bumped. This matters most for display-focused mechanical models with visible gears, layered detail, or moving sections that invite people to touch them.
Beginner Assembly Checklist
Use this checklist before and during your build. It keeps attention on the small habits that make mechanical models more enjoyable.
- Check parts first Review boards, small pieces, and instructions before pressing anything out.
- Follow the step order Mechanical sections often depend on earlier alignment.
- Test fit gently If a piece resists, check direction and leftover edges before using more pressure.
- Sand carefully Adjust a little at a time, especially near moving parts.
- Test movement early Turn, slide, or check mechanisms when the instructions allow it.
- Sort small parts Use trays or labels so tiny pieces stay easy to find.
Why Mistakes Can Be Useful
Beginner mistakes are frustrating in the moment, but they can also teach how the model works. A stiff gear teaches clearance. A reversed part teaches orientation. A lost connector teaches organization. In that sense, wooden mechanical models are close to hands-on STEM learning, where the builder learns by observing, adjusting, and trying again. This is one reason the broader benefits of STEM education connect well with model building.
The goal is not to build perfectly from the first step. The goal is to build with enough patience that each problem becomes easier to understand. That is when the finished model feels earned, not just assembled.
FAQ
What is the most common beginner mistake?
Forcing parts is one of the most common mistakes. If a piece does not fit, check orientation, alignment, and leftover edges before applying more pressure.
Should beginners sand every piece?
No. Sand only where the fit or instructions suggest it. Too much sanding can make a part loose, while too little can make moving sections stiff.
When should I test moving parts?
Test moving sections as soon as the instructions allow. Early checks make it easier to find tight gears, rubbing parts, or alignment issues.
Are powered wooden models harder for beginners?
They can require more attention because lights, motors, or sound components add steps. Beginners can still enjoy them if they follow the instructions carefully and check placement before closing layers.