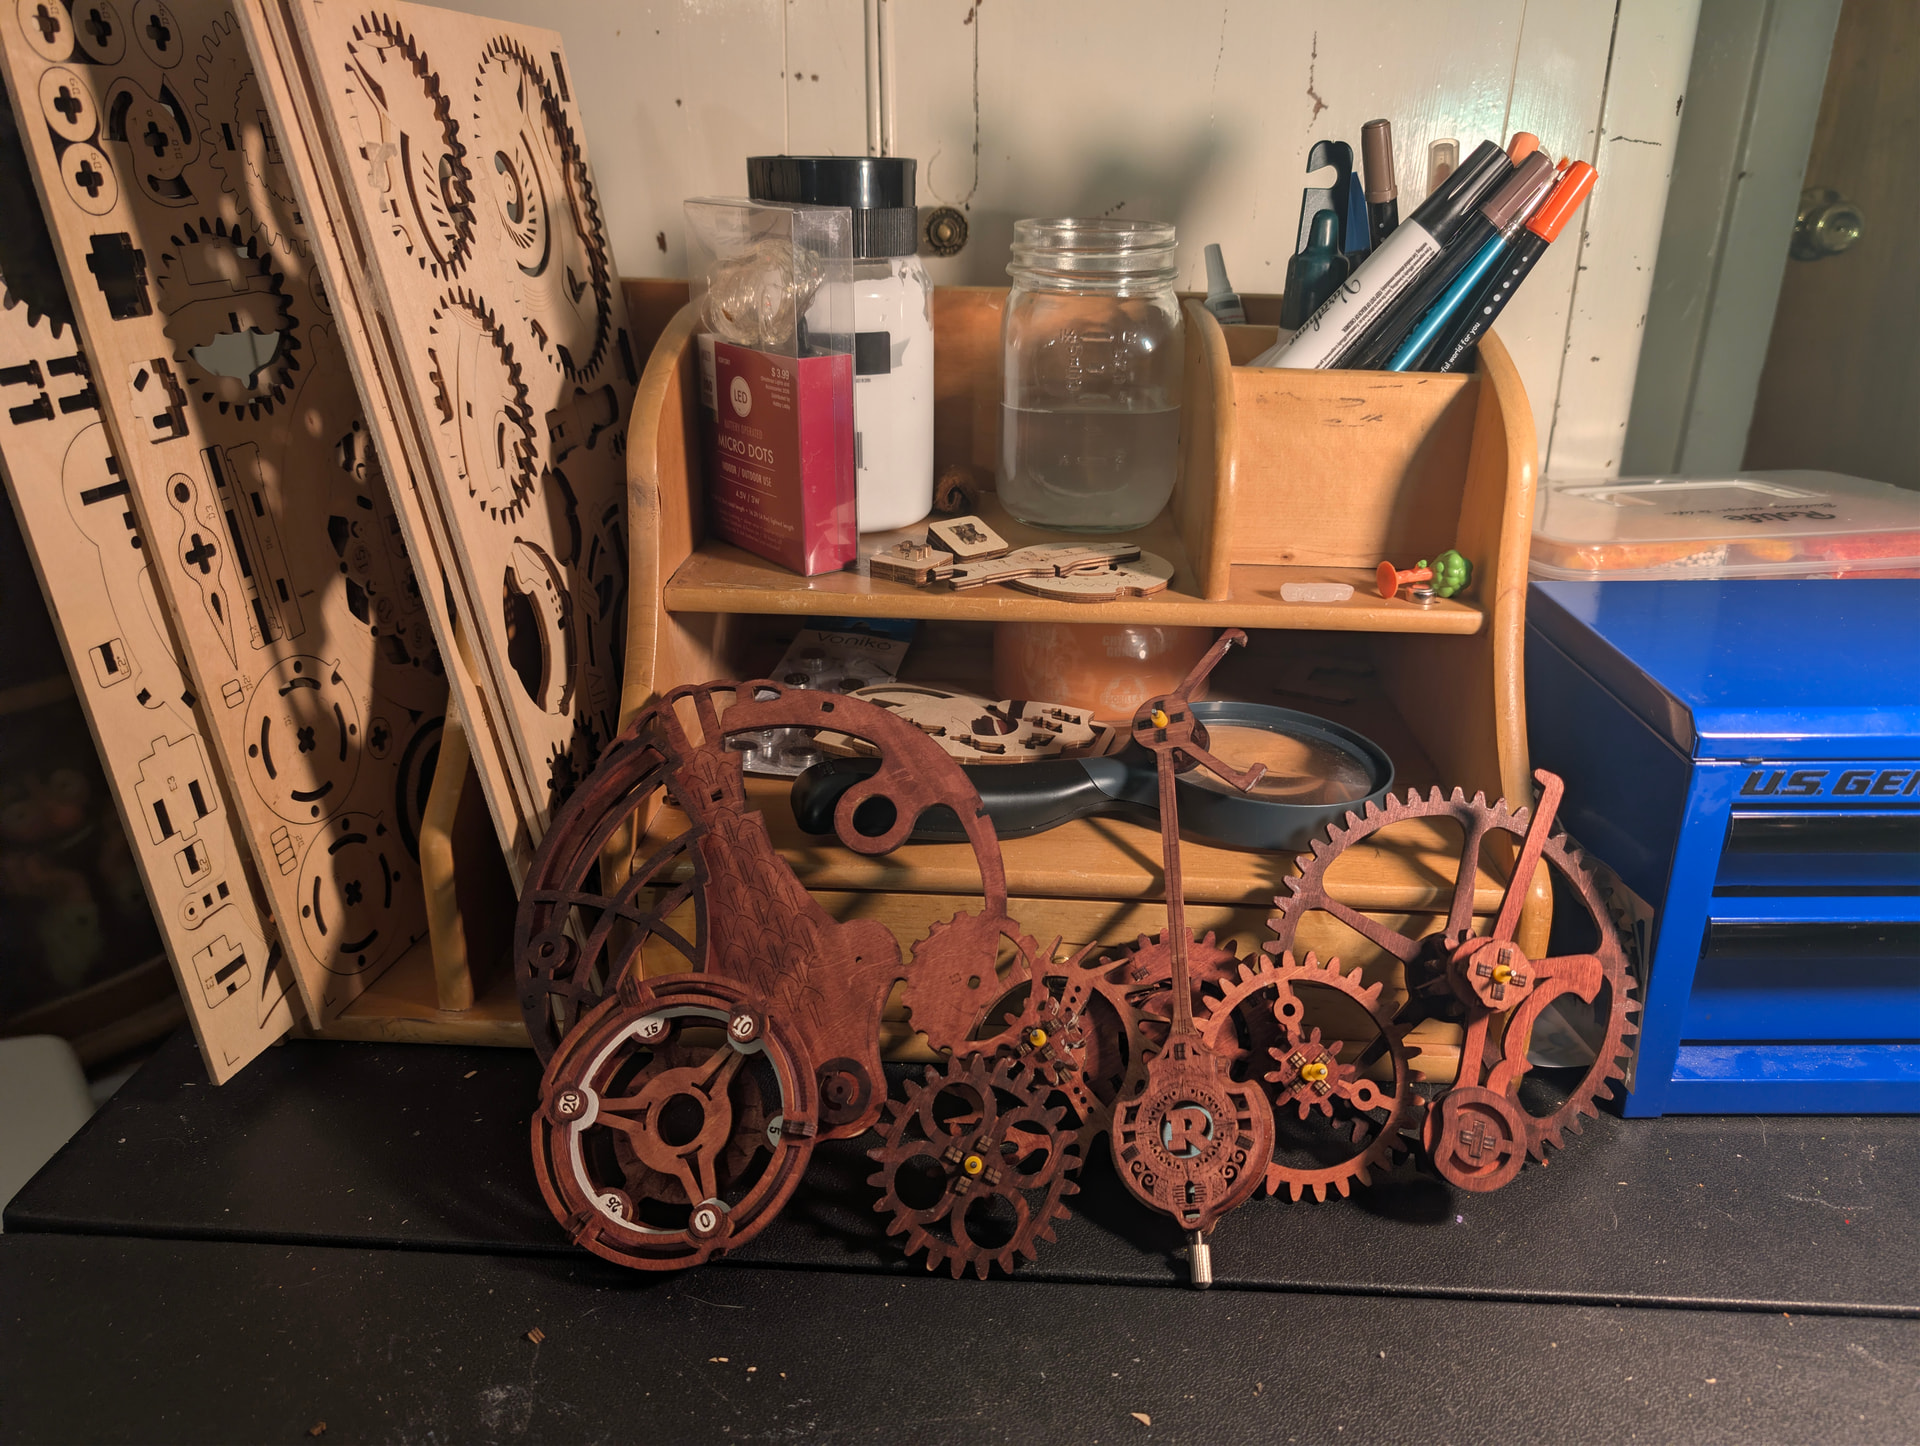
Several evenings into a mechanical wooden clock kit, you may still have separate gear groups, shafts, and frames spread across the table. The model has taken time, yet it barely resembles the picture on the box. That does not necessarily mean you are behind. In some gear-heavy kits, the early work is to build mechanisms that come together later.
While building the ROKR Owl Clock LK503, community member Mark_Rudnik described the difference from a kit that takes shape one piece at a time: this one required “groups of cogs.” Two days later, he said joining its two main parts took coordination. His account offers a useful way to think about many complex mechanical builds: identify a small mechanism, complete it, check it while you can still reach it, and then connect it to the next stage. The exact sequence always comes from your kit's instructions.
Why Gear-Heavy Model Kits Feel Different to Build
Difficulty is not simply a matter of piece count. In a decorative model, a misplaced detail may remain a local problem. In a mechanical model, a gear can depend on a shaft, the shaft on a supporting frame, and the next gear on the position of both. A small difference in an early assembly can become obvious only when two larger sections meet.
You Are Building Systems, Not Just Adding Parts
As you follow the manual, ask more than “Where does this piece go?” Also ask, “What is this group becoming?” Several pages may be forming a gear train, a rotating shaft assembly, a supporting frame, or an outer section that will later cover the mechanism. Knowing that purpose helps you recognize a natural stopping point for inspection.
This is a mental map, not permission to change the manufacturer's order. One model may call for a gear group to be completed before it enters a frame; another may build the frame around the gears. Follow the pictured sequence for the model in front of you.
Small Errors Can Travel Into the Next Stage
A reversed part, a joint that has not seated as shown, or a spacer placed out of order may look minor at first. Later, two sections may refuse to line up. Checking at the end of each accessible stage gives you a shorter trail to retrace than a single inspection after the model is closed.
Stage 1: Read Ahead Before You Start Building
Briefly scan the next few pages before removing parts. Look for groups that become separate assemblies, shafts that pass through several pieces, gears that will eventually meet, and sections that become difficult to access. You do not need to memorize the manual. You need to know what your current work is preparing for.
Map the Next Subassembly
Try a simple sentence: “I am making this gear section now; it connects to that frame later.” If you cannot yet tell how the parts relate, keep the illustrated steps open beside the work. Once a subassembly is complete, compare it with the picture before moving to another sheet of parts.
Notice Orientation Early
Before pressing out similar-looking pieces, study the illustrated front and back, left and right, engraved face, shaft direction, and any indicated spacer order. Put the pieces down in the orientation shown. Turning a part over is easy while it is loose and much less convenient after several other pieces surround it.
The manual is the authority. This article explains a workflow, not LK503's part-by-part assembly order. Use the official ROKR assembly instructions for part numbers, orientation, installation order, any wax or lubrication points, electrical components, and the checks specified for your exact model.
Stage 2: Build One Gear Group at a Time
When the instructions focus on a separate gear group, let that be the whole task for the moment. Fit the parts in the prescribed order, then compare the resulting unit with the illustration. A desk full of separate mechanisms can be a sign of normal progress. Mark's first Owl Clock update came after several nights of work, when the build still did not look like a clock.
Check Orientation and Spacing as You Go
After each group, check the gear faces against the drawing, confirm that shafts and joints are seated as intended, and account for every spacer or connector the manual shows. Look from the side to see whether neighboring pieces occupy the positions shown rather than twisting or bowing. Avoid inventing a universal clearance: the correct spacing is specific to the model and stage.
Judge Progress by the Stage
The box photo shows the destination, not the shape of every intermediate step. Progress is better measured by whether the current assembly matches the manual. If the drawing depicts three separate units on the table, three accurate units are a better outcome than one prematurely joined model.
Stage 3: Check Each Subassembly Before Moving On
“Double-check” is only helpful when you know what to inspect. At a stage boundary, turn the subassembly as the instructions allow and compare the front, back, and side. Check the order of gears on a shaft, the position of connecting tabs and pins, and the alignment of holes that another unit will use later.
Make sure each joint sits as shown. If a piece needs unexpectedly high force, stop and recheck its identity and orientation before pressing harder. A nearly seated wooden joint can change the thickness of an entire section, but forcing a misaligned joint can damage it.
Test movement only where the instructions indicate that the mechanism should move at this point. A visible gear is not, by itself, a reason to turn the assembly. Some mechanisms will not behave as they do in the finished model until later parts are installed. When a stage check is specified, do it before that section is enclosed.
Stage 4: Align Major Assemblies Before Joining Them
Mark's second Owl Clock update described the moment when two main parts finally came together: “It takes some coordination to get the two halves together.” That is a distinct task from assembling either half. Several connections may have to meet at once.

Look at Every Connection Point
Before bringing large sections together, locate each shaft entering a hole, tab entering a slot, pin or connector, gear pair that must meet, and frame edge shown in the instructions. One aligned outer tab does not prove that an internal shaft or gear is aligned. Look at the internal mechanism as well as the visible frame.
Align Before Applying Pressure
Alignment comes before pressure. Bring the sections close enough to see their interfaces, then check them together. If one side meets while another visibly misses, separate the sections slightly and inspect the missed connection. Do not force one edge home and hope the rest follows. Once the connections match the illustrations, use only the joining method and force indicated by the manual.
What Should You Check If Gear Assemblies Won't Line Up?
Start with the simplest possibilities before dismantling a large section. Work back through the drawings from the last stage you know was correct.
- Check orientation. Look for a flipped component, a reversed gear, swapped left and right pieces, or a face pointing the wrong way.
- Check seating. Compare each earlier joint with the illustration. A piece that has not reached its intended position can shift the whole assembly.
- Check the specified spacing parts. If your kit uses spacers, washers, or connectors at this point, confirm their number and order against the manual.
- Check each interface. Trace shafts to holes, tabs to slots, and gear teeth to their mating gears. Inspect the interior, not only the outside frame.
- Return to the last verified stage. Identify the last drawing your model clearly matched, then recheck the steps after it. Avoid taking apart more than the evidence requires.
Stop when resistance is unusual. More pressure will not correct a reversed piece or conflicting gear teeth. Recheck the fit before trying again; wooden tabs, slots, and gear teeth can be damaged by force.
Stage 5: Test Before the Mechanism Becomes Hard to Reach
Later frames can cover gears and make shafts harder to inspect. Before closing an accessible section, use the checkpoint provided by the manual. First ask whether the structure matches the current drawing. Then, if movement is expected now, check whether the specified part behaves as instructed. Finally, look for visible rubbing, binding, or anything out of position.
A successful stage check cannot guarantee that every later step will work. It does narrow the places you will need to investigate if a problem appears. If there is no movement test at this stage, do not invent one; verify the visible structure and continue according to the instructions.
How the Owl Clock LK503 Shows This Workflow in Practice
The current Owl Clock LK503 product page lists 161 pieces, an estimated four-hour assembly, and an Advanced difficulty rating. Its visible gears and clock-and-timer design make it a concrete example of why mechanical relationships matter while building.
Mark's first update documented the early stage: several cog groups after multiple evenings, without a recognizable clock yet. His second showed the joining stage, when two larger halves needed coordinated alignment. These are his observations of one build, not an official alternative assembly sequence. Together they illustrate the broader habit: treat each mechanism as a checkable stage before making it part of a larger whole.
Does This Approach Apply Beyond Wooden Clock Kits?
Yes, when another model has interacting mechanisms, separate assemblies, parts that become inaccessible, or a demanding final alignment. The exact order and tests will differ. The ROKR Mechanical Typewriter LK703B, for example, is another complex mechanical build; its own manual governs its assembly. The transferable habit is to identify, build, verify, connect, and test at the points appropriate to that particular kit.
Not every wooden model needs the same staged approach. Choose the workflow according to the mechanisms the instructions actually show.
A Simple Stage-by-Stage Checklist
- Before building: Read several steps ahead, identify the next subassembly, and note orientation clues.
- After a gear group: Compare all visible sides with the manual; check shafts, seating, and any specified spacers.
- Before joining sections: Locate every connection point and align internal mechanisms as well as outer frames.
- Before closing a section: Recheck the drawing and perform only the functional checks the manual calls for.
FAQs
Should wooden gears spin freely during assembly?
Not necessarily. The expected movement depends on the kit and its current stage. Follow the manual before treating resistance as a fault, and do not turn a mechanism simply because its gears are visible.
What if two gear assemblies do not line up?
Stop applying pressure. Check orientation, seating, shaft alignment, and any spacers or connectors shown. Trace back to the last stage you verified. If the fit remains unclear, consult the official instructions or support resources.
Should I glue a loose gear or wooden joint?
Do not add glue unless the specific product instructions call for it or official support recommends it. Different joints and mechanisms have different requirements, and glue can make correction harder.
Can I take a gear group apart after a mistake?
That depends on how the parts connect and how much of the model is already assembled. Check the manual, support nearby pieces, and work slowly. If a part seems likely to break, ask official support before levering it apart.
Are gear-heavy wooden models suitable for beginners?
Check the individual kit's official difficulty, estimated build time, mechanism, and your previous experience. A first builder may prefer a shorter project; someone who enjoys careful mechanical work may choose a more demanding one. ROKR's beginner and advanced model guide can help you compare challenges.
Build the Next Mechanism First
A complicated gear model becomes easier to manage when you stop seeing it as one uninterrupted stream of parts. Read ahead, identify the mechanism in front of you, build it carefully, and verify it while it is still accessible. Give the joining points extra attention. If you are building the Owl Clock LK503, keep its official instructions beside you from the first cog group to the final check.